![[Electron]今日の日付カレンダーアプリを作った(Calectron)](https://chiilabo.com/wp-content/uploads/2024/05/image-13-59-1024x576.jpg)
- Electronを使用して、Windows 7のガジェットにあったカレンダーのようなアプリケーションを作成しました。
- このアプリケーションは、今日の日付と曜日を表示するだけのシンプルなものです。
- macOS風にデザインを変更し、タイトルバーを削除して、ウィンドウ全体をドラッグできるようにしました。
1. Windows 7のカレンダーのようなアプリを作った
Electronで Windows 7の「ガジェット」にあったカレンダーのようなものを作りました。
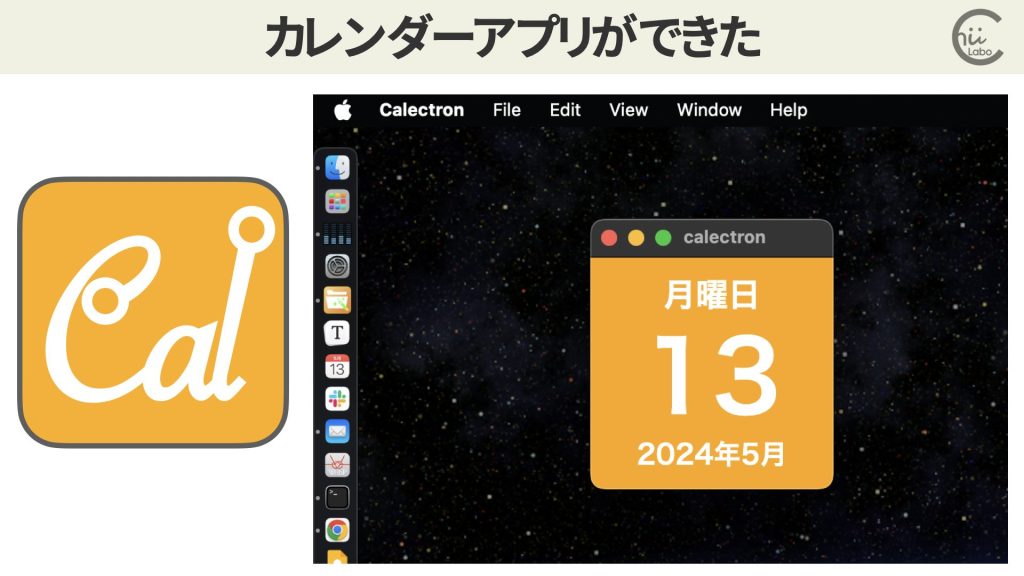
ただ、今日の日付・曜日を表示するだけのアプリケーションです。
自分用のツールなので、動作は無保証です。
Windows 7の「ガジェット」には、このようなカレンダーがあったのですが、2012年ごろに廃止されてしまいました1。

Electronを採用したのは、Macで手軽に作れて、Windowsでも使えるようにしたかったからです。
ファイル構成をtreeコマンドで出力すると、こんな感じ2。
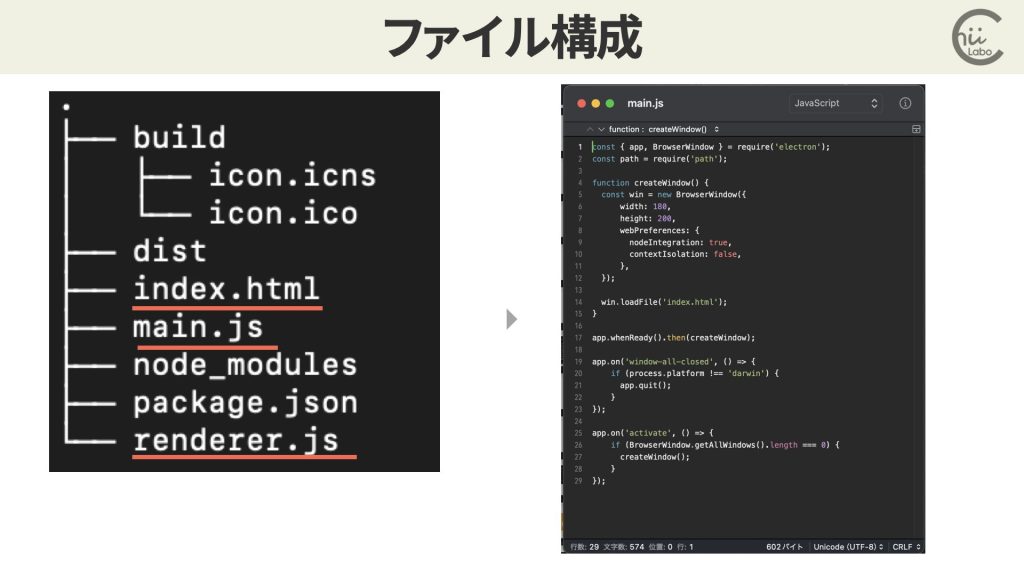
たったこれだけの構成でマルチプラットフォームのGUIプログラムが作れます。
mac用のiconファイルは、PNG ICNS 変換(aconvert.com)で変換して作りました。
1.1. main.js
Electronを使用してウィンドウを作成し、index.htmlファイルを読み込むアプリケーションの主要部分を示しています。
const { app, BrowserWindow } = require('electron');
const path = require('path');

function createWindow() {
  const win = new BrowserWindow({
      width: 180,
      height: 200,
      webPreferences: {
        nodeIntegration: true,
        contextIsolation: false,
      },
  });

  win.loadFile('index.html');
}

app.whenReady().then(createWindow);

app.on('window-all-closed', () => {
    if (process.platform !== 'darwin') {
      app.quit();
    }
});

app.on('activate', () => {
    if (BrowserWindow.getAllWindows().length === 0) {
      createWindow();
    }
});1.2. renderer.js
現在の日付と曜日を取得し、HTMLの特定の要素に表示する関数であり、1秒ごとに更新されます。
function updateDate() {
  const now = new Date();
  const year = now.getFullYear();
  const month = String(now.getMonth() + 1).padStart(1, '0');
  const day = String(now.getDate()).padStart(1, '0');
  const weekdays = ['日', '月', '火', '水', '木', '金', '土'];
  const weekday = weekdays[now.getDay()];

  document.getElementById('weekday').textContent = `${weekday}曜日`;;
  document.getElementById('day').textContent = day;
  document.getElementById('month').textContent = `${year}年${month}月`;
}

updateDate();
setInterval(updateDate, 1000);1.3. index.html
HTML、CSS、JavaScriptを使用して、日付と曜日を表示するシンプルなウェブページの構造とスタイリングを定義しています。
<!DOCTYPE html>
<html>
<head>
  <meta charset="UTF-8">
  <title>calectron</title>
  <style>
    body {
      display: flex;
      justify-content: center;
      align-items: center;
      height: 100vh;
      margin: 0;
      background-color: orange;
      color: white;
      text-align: center;
    }
    #weekday {
        line-height: 1em;
      margin: 0;
        padding: 0;
      font-size: 24px;
      font-weight: bold;
    }
    #day {
      margin: 12px;
        padding: 0;
      font-size: 72px;
      font-weight: bold;
        line-height: 1em;
    }
    #month {
        line-height: 1em;
      margin: 0;
        padding: 0;
      font-size: 20px;
      font-weight: bold;
    }
  </style>
</head>
<body>
  <div>
    <div id="weekday"></div>
    <div id="day"></div>
    <div id="month"></div>
  </div>

  <script src="renderer.js"></script>
</body>
</html>1.4. package.json
Electronアプリケーションのパッケージ設定とビルド構成を定義するpackage.jsonファイルの内容を示しています。
{
  "name": "calectron",
  "version": "1.0.0",
  "main": "main.js",
  "scripts": {
    "start": "electron .",
    "build": "electron-builder"
  },
  "build": {
    "appId": "calectron.app.id",
    "productName": "Calectron",
    "directories": {
      "output": "dist"
    },
    "win": {
      "target": "nsis"
    },
    "mac": {
      "target": "dmg"
    }
  },
  "keywords": [],
  "author": "",
  "license": "ISC",
  "description": "",
  "devDependencies": {
    "electron-builder": "^24.13.3"
  }
}
2. ElectronBuilderでビルドした
npm install --save-dev electron-builder
npm run build
Windows環境でビルドしたら、アイコンがうまく反映できなかったので、electron-packageでビルドしました。
3. macOSのカレンダー風にデザイン変更
index.htmlを編集してデザインを変更しました。
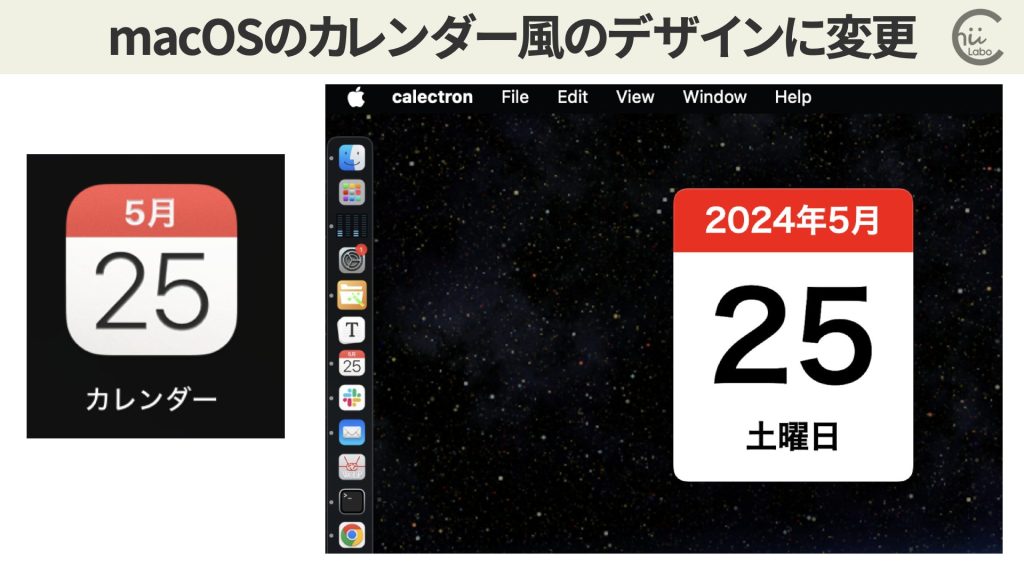
また、タイトルバーをなくして、その分 ウィンドウ全体をドラッグできるようにしました。
「閉じる」ボタンがないのですが、ウィンドウの右クリックで終了できるので、とりあえずこのままです。
こちらもどうぞ。


Electronでレンダラープロセスからメインプロセスに処理を渡して、また戻る【async/await】
レンダラープロセスから、メインプロセスで処理を移した後、レンダラープロセスに処理を戻すには、どうすればよいかハマったのでメモをしておきます。結果としては、IPC通信とasync, awaitという非同期の関数を利用することで、解決しました。プロセス間通信と処理の流れやりたいことは、・UIの実行ボタンが押して、・端末のファイル操作を行い、・終わってからUIに貯めた入力データをクリアする、ということです。UIに関するデータは、レンダラープロセスにあります。ただ、node.jsの処...
chiilabo.com
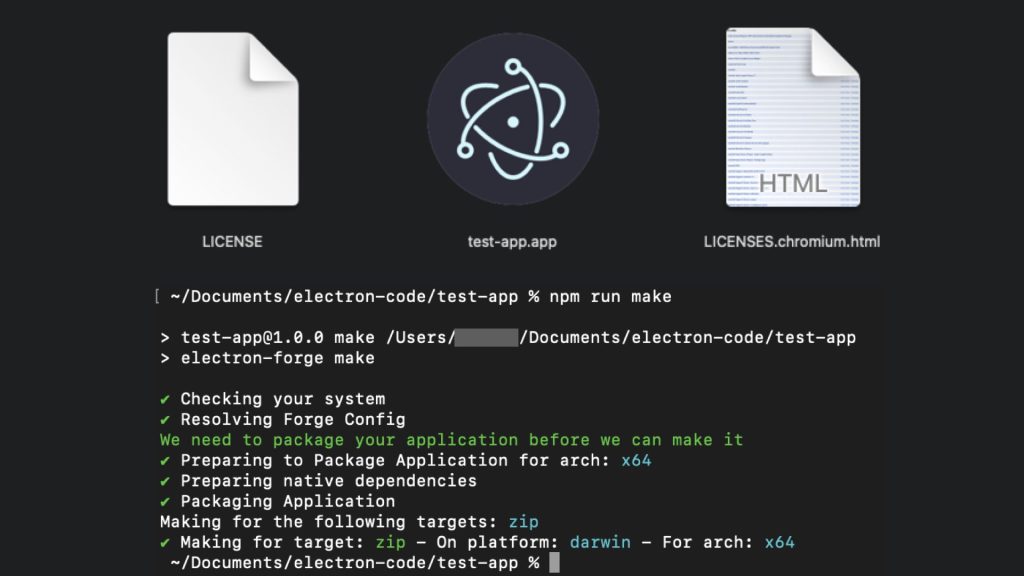
「Electronクイックスタート」をMacでたどってみた【Electron Forgeのビルド】
前回は、Electronの環境を作ったのですが、既存のソースからのビルドはうまくいきませんでした。というのも、設定が中途半端で fsやpathのライブラリがうまく読み込めないようです。そこで、原点に帰って、改めてElectronのひな形をビルドしてみました。ElectronクイックスタートElectronの公式ドキュメント「クイックスタート」に沿って、アプリを作成します。クイック スタート | ElectronMacBookでチュートリアル通りにそのままできるか、確認していき...
chiilabo.com
(補足)
QRコードを読み込むと、関連記事を確認できます。
![[Electron]今日の日付カレンダーアプリを作った(Calectron)](https://api.qrserver.com/v1/create-qr-code/?data=?size=200x200&data=https%3A%2F%2Fchiilabo.com%2F2024-05%2Felectron-today-calendar%2F)
![[Claude 3] Anthropicから利用規約などの変更のお知らせメールが届いた(社会的受容のためのルール整備)](https://chiilabo.com/wp-content/uploads/2024/05/image-10-17-1024x576.jpg)